Welcome back to #iPPP! Mama Mash and I want to see your funny, your yummy, your heartfelt, your favorite phone photos of the week. Link up below!
I mentioned this weekend that I had to scramble to get some fall decorations. I had, after all, been promising the kids all last week that we would decorate the house ON SATURDAY.
Well, Saturday came and we found three whole decorations. Scratch that. We found a set of three metal pumpkins that we stuck in the garden. So, either I threw away the rest of the fall decor last year when we decorated for Christmas, or we will find the rest of the fall decor when we decorate for Christmas this year.
We didn’t have any plans for the day, and little to no budget for buying new decor, so what’s a girl to do? Get on Pinterest, of course. I thought that surely, there would be some craft that we could make to appease the children.
Mostly, there were pictures of elaborate set-ups in homes that go all out for holidays (or at least, ahem, their blogs). But I did find a couple of things to either recreate or pull inspiration from.
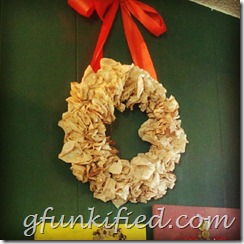
The first was this coffee filter wreath from Little Big Nest. (I really hope that this link works because as I write this, I can’t get it to open. But, I followed her tutorial almost exactly, so she definitely gets all the credit for this idea).
Source: littlebignest.com via Greta on Pinterest
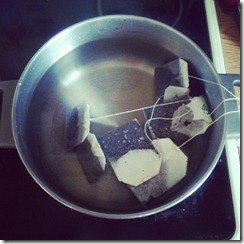
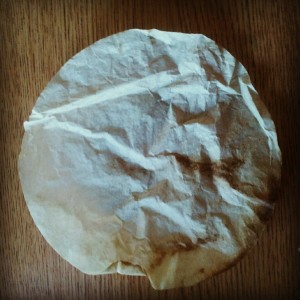
This craft took a while, but only because you have to dye the coffee filters and let them dry. But it’s SUPER easy. I used about 10 family-size (decaf) tea bags, boiled them in a pot of water for a minute and let them steep until the tea was nice and strong. Then I put in about half a package of regular, white coffee filters (the kind I don’t use anymore since getting my Keurig). I did separate the filters before putting them in the tea, just to make sure that each one was completely soaked.
I let the filters soak in the tea for probably an hour (or until I remembered they were there and got them out). Then I loosely piled them on two metals cookie sheets. The blog post I used says to let them dry for a day or so, but I thought I could do it faster by putting them in the oven on the lowest temp (170 degrees). I didn’t dry them completely this way (but mostly), and I kept a close eye on them. Please disregard the last two sentences if that was a dumb and/or dangerous thing to do. I “cooked” them for about an hour, then took them out of the oven and let them air dry the rest of the way.
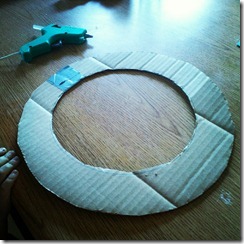
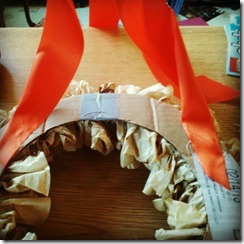
The next step was to make a cardboard circle (or frame) for the wreath. I used my largest skillet lid to draw the outside and a paper plate for the inside, then I carefully cut out the circles (cutting across in one spot in order to get into the middle, then using duct tape to re-connect it).
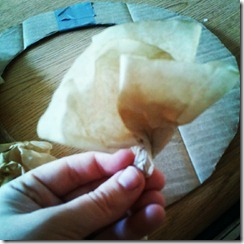
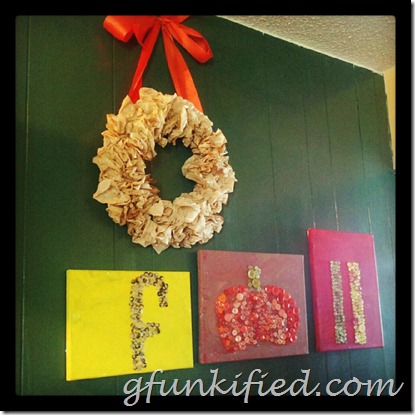
Then I simply took each coffee filter, pushed into the middle with my finger, and twisted. I ended up with a bunch of “flowers”. It was so easy that I gave the job to the five-year-old, so she made the flowers and handed them to me. I then hot-glued them one at a time onto the cardboard, first in a line around the outside, then a line around the inside (making two rows of filters).
When the front was full, I flipped it over and hot glued two thick, orange ribbons to the top back, then tied them in a big bow to hang. I re-fluffed the filters to make them full and poofy, and it was done!
The second craft involved me and both girls. The inspiration came from this pin:
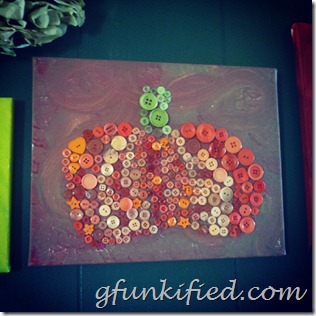
It’s actually an Etsy listing for a super cute set of wooden blocks. I didn’t have the supplies or ambition to try to make that myself, but I did have canvases from Hobby Lobby, acrylic paint, and buttons!
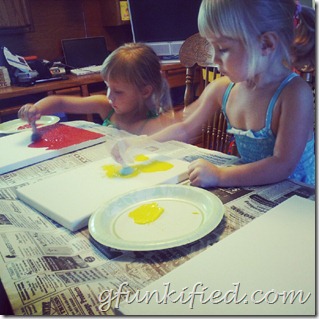
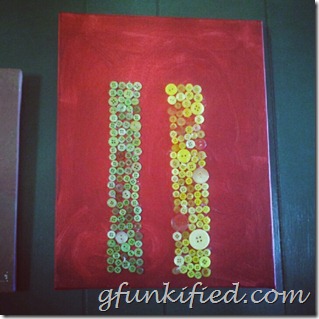
The girls and I painted three canvases in various sizes. We blended the paints a little to make the colors more fall-like (the yellow turned out brighter than I had hoped, but that was Essie’s canvas and I wasn’t about to change it) and painted with little round sponges. The girls were super proud of the swirly designs that they ended up with.
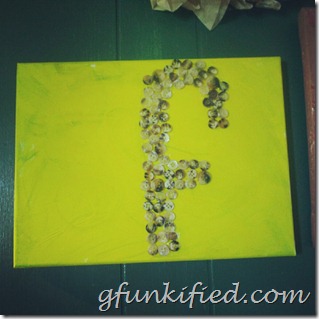
We let the paint dry completely, then sorted the buttons that we needed. We used green and orange buttons for the “A” pumpkin, and brown, yellow, red for “F” and two “L”s. I penciled the letters onto the canvases for an outline, then I just went to town with my hot glue gun and piles of buttons, filling in as close to the outlines as I could.
I have used buttons a lot before for crafts (even decorating a pumpkin for Halloween last year), because the designs don’t have to be perfect. They end up with lots of texture, colors, and that 3-D quality that I like.
Here’s what we ended up with by Sunday afternoon. I think it turned out really cute! I’m sure we’ll make other crafts to decorate with, but for now, we’ve got the Autumn vibe in the house.

<div align="center"><a href="http://www.gfunkified.com" title="GFunkified"><img src="http://mamamash.files.wordpress.com/2012/06/ippp-polaroid-125-x-125.jpg" alt="GFunkified" style="border:none;" /></a></div>






No WAY. That is super cute. I am not at all crafty, but I'll pay you to make me a fall canvas set. 😉 Especially if the kids autograph it.
GIRL. It was so easy. I do not do elaborate crafts, I stick to what I know, and what I can do quickly (because I'm all about immediate gratification). But of course, the girls and I would make one for you if you wanted it!
I was watching you on Instagrams post all your cool pics- and jealous beyond belief. I will not be making or buying any great fall decor this year. I'll put out what older stuff I have- but oh how I would love to make your fun wreath! Great job and you better believe I will be watching you at Christmas!
Aw, Farrah! We'll make another craft in your honor. 😀 And yes, I'm sure we'll be finding plenty to do come Christmastime.
Adoreable. THanks for sharing that! What a great idea!
It's all So easy!
Adorable! I love that wreath!!
Isn't it cute?! As soon as I saw that you can just cut out a cardboard circle, I was sold. I hate when you have to have raffia or foam or whatever-the-heck-else to make a wreath.
Oh my, you're so crafty!!!
I know I'd end up hurting someone with the glue gun if I ever got my paws on one.
Alison, I have hurt myself EVERY TIME I've used a hot-temp hot glue gun. I refuse to use them anymore. I ONLY use the "cool-temp" glue guns, so when I get glue on my fingers (as I always do), I barely notice. Except that it's sticky.
How crafty! And I'm laughing at Alison because I've had the same thoughts about glue guns. They scare me.
They scare me, too, Katie. I refuse to use anything but the "cool-temp" hot glue guns so when I get glue on my fingers, I don't curse in front of the children.They're amazing! I bet your girls would totally get into something like this.
That is just the awesomest! I LOVE decorating for fall and I am sure we can find a place to hang an awesome wreath like that! You are the best. I only hope mine will turn out half as good. Thanks for the ideas!
Seriously, SO STINKING EASY. I don't think you could mess that wreath up if you tried. I want to see pics if you make them!!
This makes it SO much more special that they were all involved! I love these decorations. Great job!
Thanks! I know, the girls had so much fun! And even Henry, though he didn't feel like doing much, was all into the finished product and the buttons I chose and everything. Someday, your little man will be sewing belts and making necklaces right along with you. 😀
DUDE!! That is so awesome. I can't believe those are coffee filters! Looks amazing!
I know! I was all into the project, from the filters and tea (which I had) to the cardboard (which the garage was full of). It was so easy and everything was just lying around the house. My kind of project!!
I gotta say, I'm impressed that you own a glue gun! In my book, that makes you a craft queen! Also, I love the button FALL sign – tres chic!
Ha! Anybody can own a glue gun…they're like a dollar at the impulse rows in Hobby Lobby. 😀 But thank you….I love the instant gratification of putting a simple craft together (key word being SIMPLE).
[…] in the #iPPP linkup Greta shared a post filled with fantastic fall decor that she was making with her kids. I was, and remain jealous. This year I won’t be popping in […]
Look at you! SO cute!
Ha, thanks! SOOO easy.
Amazing!! I've seen the coffee filter craft before but I had no idea it was so easy! You did a beautiful job.
Ahh…your house looks so cute! I am not ready to admit that summer is over so I'm not decorating for fall.
[…] quiet with only Ivy at school, and we did some crafting. As you probably already know, we love button crafts around here, but the idea for the reindeer “art” came from this link that I found on […]