For me, this week has been spent creatively (and perhaps, frugally). After pinning several DIY dresses in the last few months, I finally decided that it was time to try to make some. In the past three days, I’ve made six dresses, three of which I had no help on.
I know how to sew, but I’m not great at it. I can sew straight lines pretty well, if I take it slow and pay attention. This dress that I’m about to show you? Nothing but straight lines, seriously. Easy peasy.
I got the idea from two different pins on Pinterest. One was this jersey maxi dress, and the other was actually an infant dress. I’m not much of a tutorialist (although, I am pretty good at making words up), so I encourage you to check those out if you’re having trouble here. Ahem.
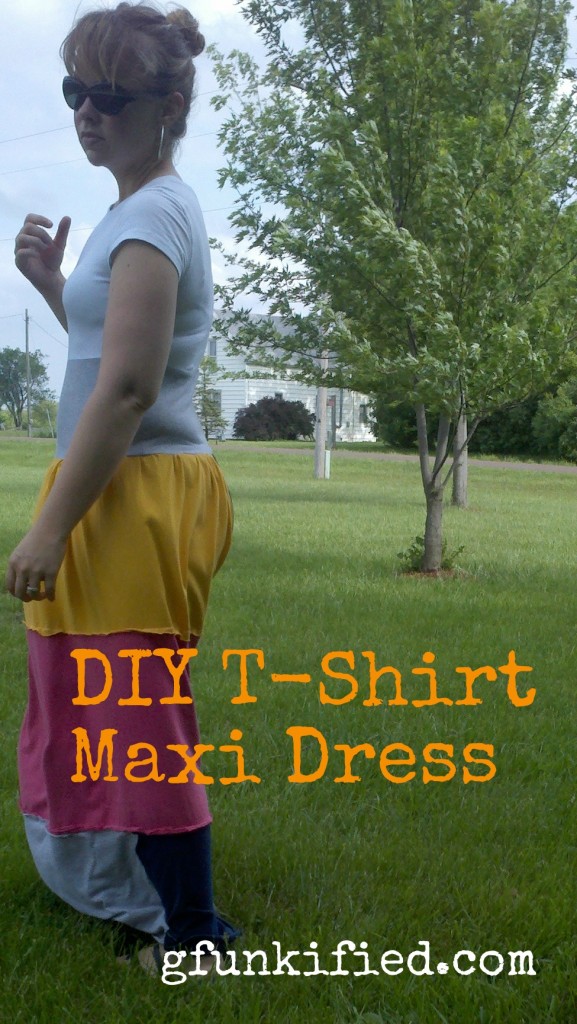
The basic idea is to “quilt” together pieces of old t-shirts to make a skirt, and sew it onto a shirt that you’ve shortened.
You’ll need:
several old t-shirts (I used 6 total) a shirt or tank that you want to use for the top of the dress (mine was a stretchy tee that was too snug around the belly but fit perfectly around the chest) thread (I used all white, but you could use whatever matches your shirts) sewing machine (or a heckuva lot of patience to do it by hand)Find several too-large, old t-shirts. I found some colors that I thought looked good together, but if all you’ve got is white, by all means, dye it. I’m an instant-gratification gal, though, so I went with what I had.
Cut the shirts straight across about 14 inches from the bottom, which should be just under the armpits. You could definitely use skinnier strips but I thought the amount of sewing I was already going to be doing was plenty.
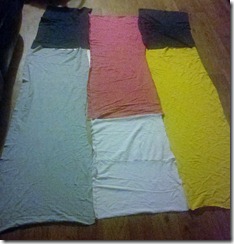
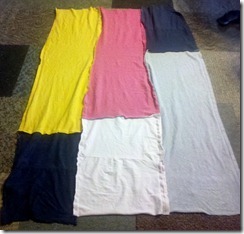
The panel that you’ll use for the skirt needs to be about one and a half times the width of your waist. I ended up about one and a half t-shirt pieces for each “layer”, and mixed up the colors until I found a layout that I liked.
Sew the two pieces together to form long strips (long t-shirt piece plus short piece). I ended up needing three to get the right length for my skirt. Depending on the size of your t-shirt pieces, you may need more or less.
I used a short zig zag stitch for extra durability.
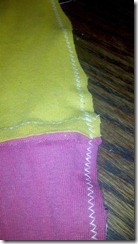
Note: For the skirt, I wanted the dress to be super casual and a little “deconstructed”. I sewed each piece wrong side to wrong side, so I ended up the with edges showing. You could definitely sew them right side to right side so you don’t have the “frayed” edges sticking out.
Sew the lengths together to form the skirt panel. Trim the edges as needed to make them even and straight.
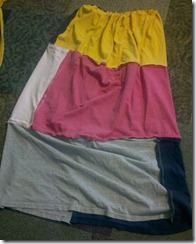
Next, you’re going to sew a very long straight stitch along the top of the panel, which will end up as your waistband, leaving long thread tails on either end. Do not back stitch. Pull the thread (gently) to gather the waist, being careful to keep the gathers evenly spaced.
Now, take the shirt that you’re using for the top and try it on. Mark where you want it to end, and cut straight across.
Take one more old t-shirt and cut a strip about 4-6 inches tall and wrap it around your waist. There will be no gathering on this strip, so trim it so it will be as snug as you want the midsection of your dress to be. (You could skip this extra panel across the midsection, but I like the color block look and think it’s pretty slimming)
Sew the top and midsection together. This time, I sewed right side to right side, because I didn’t want to add any extra attention/bulk to my belly.
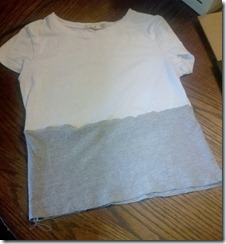
Now, carefully sew the top section to the skirt. Once again, I sewed the right sides together for this part so the edges were in the inside.
Now try your dress on again and shorten as needed. The beauty of making a casual dress out of t-shirts is that you can cut across the bottom instead of hemming it. It’s not going to fray! Of course, you can hem it if you’d like.
And you’re done with the most comfortable dress you’ll ever wear!




This is so cool. I'm totally impressed!
Thanks, Natalie! It was easy-peasy, even for me.
Oh my, that's so pretty!!! I wanna see the other dresses too 🙂
I love this! I have a lot of old shirts that I can do this with for myself or my daughter!
This is just so cool! I'm going to have to bring you some shirts. 😉
Very cool! This is going on my list if things I want to try *if* I ever have time. It would also require me to get a sewing machine because I am NOT that patient. 🙂
It looks awesome! I have to say that I'm incredibly impressed. You make it sound simple, but I can't sew at all, so it seems like a major effort to me!
You make it sound easy. My sewing machine is, however, laughing in the closet.
I'm so impressed that you made dresses!!
(I can't sew. Like at all. Shameful, yes? :))
I'm pretty sure I can't sew. I learned some in high school but haven't tried since. It's so great that decided to go for it and made six! I hope you're gonna show the other ones.
Smart idea 🙂 you are so good 🙂
[…] made some t-shirt dresses on May Day (I mean….who doesn’t?). This was Ivy’s. It’s very….90s. […]
Check this out…
[…] that is the end of this article. Here you’ll find some sites that we think you’ll appreciate, just click the links over[…]……
Great website…
[…]we like to honor many other internet sites on the web, even if they aren’t linked to us, by linking to them. Under are some webpages worth checking out[…]……
I love the color combination, it made the whole thing stands out, just like me when I was still a newbie all I do is straight line.